How to store rice daily: airtight container setup guide
How to set up airtight rice containers for everyday use: seal types, pest treatment, shelf placement, and realistic shelf life for Filipino kitchens.
What you’ll be able to do — and why it matters
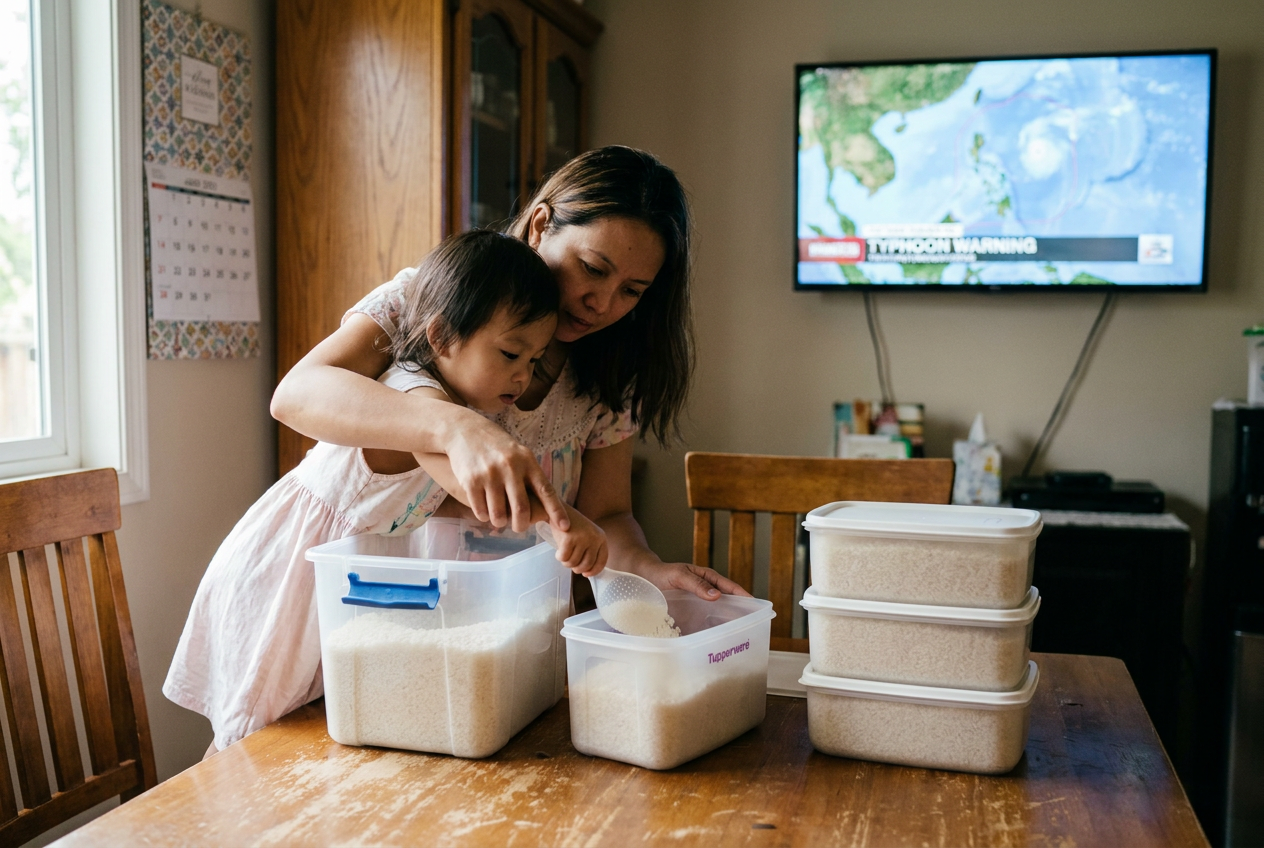
By the end of this guide you will know how to set up the everyday, grab-it-every-morning layer of rice storage: the airtight containers on your kitchen shelf, not the big drum in the bodega corner. This is the tier that gets opened almost daily, so it has different rules than long-term bulk storage. Get it right and your rice stays free of weevils and off-smells for months. Get it wrong — a loose lid, a container baking next to the stove, old rice topped up with new — and you will not notice the damage until you cook it and something is off.
If you are still deciding how to store rice for the whole household, start with our hub guide, Long-term rice storage: the complete guide for Filipino households, which lays out the full picture: bulk reserve, vacuum sealing, and this everyday container layer working together.
Quick spoilage recap. Rice spoils mainly three ways: moisture (leads to mold and clumping), pests (rice weevils and their eggs, often already in the grain when you buy it), and, more slowly, oxidation and rancid oils in the bran layer, which matters more for brown or unpolished rice. Airtight containers address the first two directly — they keep humidity out and stop weevils from getting in or out. They do less against oxidation, which is why very long storage still favors vacuum sealing or bulk containers with oxygen absorbers, covered elsewhere in this series.
What you need
You do not need anything fancy. What you need is containers that actually seal, sized for how your household really cooks.
Container materials
- Glass jars. Heavy, see-through, and inert — glass never absorbs odors or leaches anything into the rice. The downside is weight and breakage risk, and clear glass lets light in, which matters more than people think (more below).
- Food-grade plastic canisters. Light, stackable, and usually the cheapest option at any Shopee or Lazada kitchen store. Look for a “food-grade” or BPA-free mark. Avoid repurposing containers that held chemicals, paint, or anything with a strong smell — plastic holds onto odors more than glass or steel.
- Stainless steel. Opaque, so no light problem at all, and it will outlast the other two. It costs more and you cannot see the rice level at a glance, which some households mind and others do not.
None of these is wrong. I have used all three in different kitchens, and the material matters less than the seal.
Seal types
- Silicone gasket with a locking or clip lid. This is what I reach for. The gasket compresses when you snap the lid down, and it is the most reliably airtight of the common options.
- Clamp lids (the wire-bail style you see on some glass jars). Good seal when the gasket is intact, but the rubber gasket perishes over time and needs checking every so often.
- Screw lids. Convenient and cheap, but only as airtight as the thread and the liner inside the cap. Cheaper screw-lid tubs are the ones most likely to let in humidity during a long, wet stretch of weather.
Sizes for daily use
Think in terms of how many days a container should last your household, not how much it can physically hold. A container that lasts 3–7 days between refills keeps rotation frequent and keeps you from repeatedly opening a huge container and exposing all that rice to air every time. For a family of four eating rice daily, something in the 2–5 kilogram range per container is usually the sweet spot. Larger households can run two or three same-sized containers rather than one giant one — that way you are only ever exposing a week’s worth of rice to air at a time.
The method
1. Test the seal before you trust it. Here is the simple test I use on any new container: put a piece of tissue or a strip of paper over the mouth, close the lid, and try to slide the paper out. You are looking for real, noticeable resistance — the paper should tear or drag hard, not slip out with a bit of light friction. If it slides free without much fight, the seal is not biting down properly.
Follow that with a second check, but be sensible about which containers you put it through: fill the container partway with water, seal it, and turn it upside down over a sink for a minute, watching for drips or dampness around the lid. This works well for glass jars with silicone gaskets or clamp lids, since they are built to handle liquids. I would not invert a screw-lid tub with a thin cardboard-backed liner, or any container whose lid design was never meant to hold liquid — for those, the paper-strip test plus a visual check of the liner is enough. Do this once when you buy a container and again every few months, since gaskets do wear.
2. Freeze new rice before it goes in the container. Rice weevils, or their eggs, are frequently already present in rice when you buy it — this is normal and not a sign of a bad store. Freezing at -18°C (0°F) — the setting most home freezers are already at — for at least 4 to 7 days kills weevils and larvae reliably, though eggs laid deep inside a grain are the hardest stage to reach with cold alone. For better odds against those, freeze for the full 7 days rather than the minimum, and if you want extra insurance, let the rice come back to room temperature for a day after the first freeze, then refreeze for another 2 to 3 days — the warm-up triggers any surviving eggs to develop, and the second freeze catches them at a more vulnerable stage.
Portion the rice into freezer bags before freezing, and let it come fully back to room temperature before transferring it into your airtight container, so you are not sealing in condensation. Skipping the freeze step is the single most common reason a “sealed” container still ends up with bugs weeks later — the eggs were already inside the grain, not introduced by a leaky lid.
3. Fill the container properly. Pour the rice in dry, in a dry room — not straight out of a humid delivery box on a rainy afternoon. Fill to a level that still lets the lid close and seal without straining the gasket, usually leaving a small gap at the top.
4. Decide on oxygen absorbers or desiccant packs. For this everyday layer, used within weeks to a few months, small oxygen absorbers and desiccant packs are usually unnecessary. They earn their place in the bulk reserve and vacuum-sealed layers, where rice sits untouched for many months or years. If your kitchen runs genuinely humid — ground floor, poor ventilation, coastal air — a small desiccant packet is a reasonable extra layer of insurance in the container, but it is a nice-to-have here, not a requirement.
5. Label and date every container. Write the fill date on a piece of masking tape or a label on the lid. Note the rice type too, if you keep more than one (well-milled, brown, malagkit). This single habit is what makes first-in-first-out rotation possible without guesswork.
6. Practice first-in, first-out. Always cook from the oldest container first. When a container is nearly empty, finish it before refilling — never pour new rice on top of what is left.
Why you never top up old rice with new
This is worth spelling out because it is an easy habit to fall into. Topping up mixes rice of different ages, which defeats your labeling and rotation system immediately — you no longer know how old the rice at the bottom is. Older rice at the bottom is also more likely to carry moisture, fine dust, or the beginnings of pest activity, and mixing it with fresh rice can transfer that problem upward into rice that would otherwise have been fine. Empty a container fully, clean it, then refill.
Cleaning containers between refills
Wash with ordinary dish soap and warm water, rinse well, and make sure the container is completely dry before the next fill — any residual moisture defeats the whole point of an airtight seal. Let it air-dry upside down, or wipe the inside with a clean cloth. Check the gasket or lid liner while it’s off: wipe away any dust or old rice starch built up in the groove, since that is where seals start to fail first.
Shelf placement
Keep containers away from the stove, any oven, and direct sunlight. Heat speeds up both moisture problems and the slow rancidity of the oils in the bran layer, and a shelf near a stove runs warmer than it looks or feels. Sunlight matters even more for clear containers — light striking rice over time contributes to the same oxidation issues that cause off-smells and flavor loss, so a clear glass or plastic canister on a sunny windowsill will age its rice faster than the same rice in an opaque steel container in a shaded cabinet. If you love glass jars for the visibility, keep them in a cabinet or a shaded pantry corner rather than open shelving that catches window light.
A cool, dry, dark cabinet at a normal room temperature is the target. It does not need to be fancy — it needs to be out of the sun and away from heat.
Variations & conditions
Humid households. If your kitchen is genuinely damp — near a bathroom, on a low floor, poor airflow — lean toward glass or steel with a silicone gasket, and consider a small desiccant pack even for short-term storage.
Households with elderly members or younger kids helping in the kitchen. Choose containers with a lid action that is easy to open with one hand and clearly labeled so anyone in the house can tell at a glance which container is oldest and should be used first. This is less about the storage science and more about kitchen safety and ease — a container that is a struggle to open often ends up left ajar, which quietly undoes the airtight seal.
Brown or unpolished rice. Because the bran layer oxidizes faster, keep quantities smaller and rotate faster than you would with well-milled white rice, and favor opaque containers even more strongly.
Typhoon season and extended power interruptions. Airtight containers do not depend on electricity the way a refrigerator does, and that is one of their quiet advantages — the seal does not fail just because the lights go out. That said, a brownout with no fans or airconditioning running can let a room heat up for hours or days, and that heat still nudges along the slow oxidation of rice in the bran layer, especially for brown rice. It is a minor effect over the span of one outage, not a spoilage risk the way it is for refrigerated food, but it is not truly “unaffected” either. When PAGASA raises a Signal No. 1 or 2 for your area and households start stocking up, this is genuinely one less thing on the list — your sealed rice containers on the shelf will ride out the outage fine. Just do not leave them sitting against a wall that is baking in un-airconditioned afternoon heat for days on end if you can help it.
Common mistakes
- Trusting a lid by looks alone. Some screw lids look sealed but are not — always run the paper-strip test on a new container, and expect real resistance, not just light drag.
- Skipping the freeze step, or freezing too briefly, and assuming a sealed container alone stops weevils that were already in the grain.
- Topping up instead of emptying and refilling — this is the single habit most likely to quietly age your rotation system into uselessness.
- Storing clear containers on a sunny shelf because they look nice, without noticing the shelf gets afternoon sun for hours.
- Forgetting to date containers, which makes first-in-first-out impossible to actually follow.
- Putting a container right beside the stove for convenience, not accounting for the heat it absorbs during cooking.
How to practise safely
Before you commit your whole pantry rice to this system, run it on one container first. Fill it, date it, and check it weekly for the first month — look and smell for any hint of dampness, clumping, or off odor. Do the seal tests on any container before you trust it with a full batch, choosing the water test only for containers rated to hold liquid. If you are new to freezing rice before storage, do a small batch first and confirm it comes back to a normal dry texture after thawing, with no clumping, before scaling up.
If you find weevils in a container you already filled
This happens even to careful households, usually because an egg survived the freeze or was introduced after freezing. If you spot a handful of weevils in an otherwise normal-smelling, non-clumped batch, it is not automatically a write-off: sieve the rice, spread it out to air in a dry, shaded spot, and pick out or sieve away any live insects and visible larvae. Refreezing the sieved rice for another 4 to 7 days at -18°C before returning it to a clean, dry container is a reasonable extra step if you want to be thorough. Discard the batch instead if the infestation is heavy, if you see it recurring in the same container repeatedly, or if there is any mold smell, sourness, or clumping alongside the pests — at that point sieving will not save it, and eating it is not worth the risk.
Expected shelf life
Used as the everyday layer, well-milled white rice in a properly sealed container, kept cool, dry, and out of the sun, generally keeps its quality for about 6 to 12 months under good conditions. That upper end assumes a genuinely cool, dry, dark cabinet — in a warm, humid Philippine kitchen without airconditioning, especially on a low floor or near the kitchen heat, it is more realistic to plan on the lower half of that range, closer to 4 to 8 months, and to lean on your senses and the freshness checks in this guide rather than the calendar alone. Brown and unpolished rice, because of its oil content, is shorter still — typically best used within 3 to 6 months, and sooner in a hot kitchen. These are ranges, not guarantees; your actual result depends on how consistently the container is sealed, how often it is opened, and your kitchen’s heat and humidity.
Discard rice that shows mold, a rancid or sour smell, or any infestation that persists after sieving, airing, and a refreeze. No container, seal, or storage trick makes rice like that safe to cook.
Pros and cons
Pros
- Fast, convenient access for daily cooking — no digging into a bulk container.
- Simple to test, label, and rotate.
- Does not depend on electricity, unlike refrigeration.
- Wide range of affordable options at any hardware or kitchen supply store.
Cons
- Not a long-term solution on its own — oxidation and quality loss still creep in over many months, and faster in Philippine heat than the calendar guidance for temperate countries suggests.
- Clear containers need deliberate placement away from light.
- Seals wear out and need periodic checking, especially gaskets and screw-cap liners.
- Multiple small containers take more shelf space than one bulk drum.
This layer works best as part of a system: daily containers on the shelf, fed from a bulk reserve or vacuum-sealed stock kept further back. If you have not set up that reserve yet, the next two guides in this series cover it directly.